How to Use Web Based Voice Messaging
Web PhoneManager (WPM) brings your voice mail system right to your desktop. Use WPM from any browser to manage your voice mailbox, establish or change notification settings, listen to messages, record greetings, and even send new messages. WPM is both simple and secure. It will allow you to easily access and organize your messages wherever you are.
NOTE: Not all features displayed in WPM may be active on the VCU System.
Click here to launch a video tutorial.
**Security Changes effective November 1, 2024**
Access to Web PhoneManager:
- Network connection to VCU/VCUH network -or-
- VPN connection via Zscaler, AnyConnect or Global Protect Desktop
Access via the CX-E Mobile Application from iOS and Android devices
- Off Campus - Connection to a VPN application*
- On Campus - Connection to the VCU and/or VCUH Wireless Network
* At this time VPN options for VCU and VCUHS on mobile devices is very limited. Please check with your IT representative to find out what is currently available.
Click here to jump to How to Set Up and Change Notification (Email, Text Msg, Phone, Pager) all other features of WPM are listed below.
On this page
Getting Started - What to do first (Please see the security changes noted above)
- Inbox
- Listening to your messages
- Replying to a Message
- Forwarding a Message
- Record and Send a Message Directly to Voice Mail
- Saved
- Deleting a Message
- Recover a Deleted Message
- Recording Your Name
- Greetings
- Recording your Standard and Busy Greetings
- Recording and Setting Your Out-of-Office Greeting
- Distribution Lists
- Phone Numbers Tab
- Personal Operator
- Security Code
Getting Started
WPM is equipped with a context specific "help" option in the upper right hand corner of every screen. Click on "help" at anytime to open a window with more detailed information regarding your options for that screen.
Login
Richmond based subscribers go to https://webvmail.vcu.edu/
VCUHealth CMH in South Hill based subscribers go to https://webvmail.vcu.edu/cmh/ .
At the log in page enter your 5 digit mailbox number and security code -(the same code you use to access your mailbox from your telephone) Don't enter # after the security code.
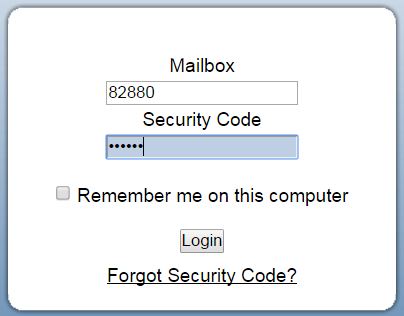
Click "Login"
Establish Web PhoneManager Settings
Playback Tab
You will want to select a message playback option. The three choices are shown here and described below:
Telephone
This option calls you on a telephone and plays the message to you. You specify the telephone number which the system will use to call you in the Telephone Number box. It can be a 5 digit VCU/VCUH extension or a local or long distance number. 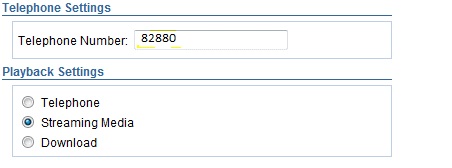
If you select Telephone as a playback method, double-check that the number at which you wish to be called is properly entered into the Telephone Number box higher up in the page.
Be aware that when you click on a voice mail message, and the voice mail system calls you at the number you specify, it will play the message once the phone is answered. No password is required. So if you use this method, you need to be very aware of the phone number on which the voice mail system will call you, especially if you tend to get sensitive voice mail messages you don't want others hearing.
Streaming
This option plays the message over your computer's speakers. This is the cleanest method of playing back messages over your computer's speakers. Note: you may need to check your pop-up settings for this method.
Download
This option downloads a copy of the voice mail as a .wav audio format file, then that typically plays over your computer's speakers using whatever software is set to play media, typically iTunes or Windows Media Player.
If you make any changes to these settings, or to the Telephone Number, be sure and click the OK ![]() button to save your changes.
button to save your changes.
Home
The home screen will display your inbox and is used to manage all of the messages currently in your inbox. You can listen, forward and reply to messages.
Inbox
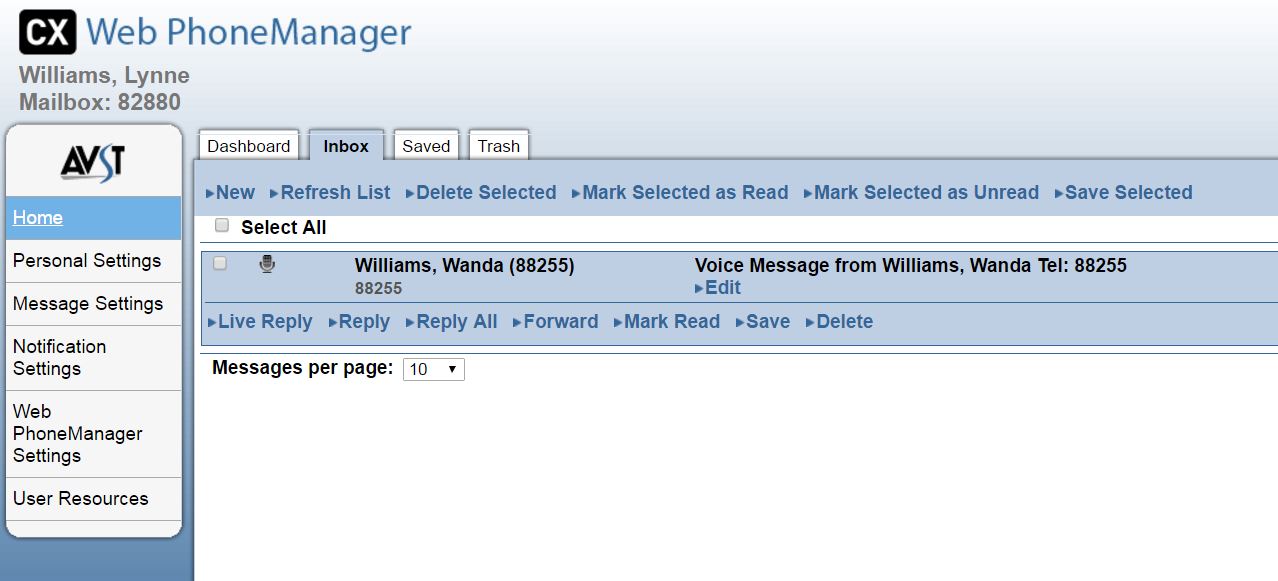
Listening to your messages
To listen to a message, click the sender's name on the message you want to hear, and then click the Play![]() button. Click here for a short tutorial on how to play your messages.
button. Click here for a short tutorial on how to play your messages.
You can listen to your incoming voice messages in one of the following three ways: See Playback tabunder Web PhoneManager Settings:
- Telephone playback plays your messages back to you via your telephone
- Streaming playback plays your messages to you as streaming Internet audio. When you click the Play button, it plays your selected message, but no copy of the message is created on your computer.
- Download playback allows you to download your voicemail and save it on your computer as a .wav file. This gives you the opportunity to save and or send the message via email to a user who doesn't have a UW-Madison voice mail Box.
Replying to a Message
- Select the message you would like to answer, and then click Reply. This will bring up the following screen.
- Click the red Record button. The voice mail system will call you so you can record your message.
- Record your message at the beep, click Stop, and then hang up.

- Type the name or mailbox number (5 digit) of a recipient and click Search.
- Select the recipient's name in the left-hand column, and then click Add to move it to the right-hand column. This adds the recipient to the list of people who will receive your reply.

- Repeat steps 4 through 7 for any additional people who should receive this reply.
- Choose the options you want to apply to the message. You can mark the message as urgent or make private which prevents the recipient from forwarding it to anyone. You can also request to see a notification when the recipient listens to the message.

- When you are finished addressing your message, click Send to send it.
Note You cannot send a voice message or reply to messages from outside the Voicemail system, and you cannot add other recipients when you reply to a private message.
Forwarding a Message
- Select the message you would like to forward, and then click Forward. This will bring up the following window.

- Optionally, you can record an introduction to the forwarded message by clicking the red Record button to record an introduction. The voice mail system calls you so you can record your comments. Record your comments at the beep, click Stop, and then hang up.
- Type the name or mailbox number (5 digit) of the recipient, and then click Search.
- Select the recipient in the left column, and then click Add to move it to the right column.
- Choose the options you want to apply to the forwarded message. You can mark the message as urgent or make private which prevents the recipient from forwarding it to anyone. You can also request to see a notification when the recipient listens to the message.
- When you are finished addressing your message, click Send to send it.
Record and send a message directly to voice mail
- In the Inbox or Saved tab of the Home menu, click New.
- Click the Record button. The voice mail system calls you so you can record your message.
- Record your message at the beep, click Stop, and then hang up.

- Type the name or mailbox number (7 digit) of the recipient, then click Search.
- Select the recipient in the left column, then click Add to move it to the right column.
- Choose the options you want to apply to the message. You can mark the message as urgent or make private which prevents the recipient from forwarding it to anyone. You can also request to see a notification when the recipient listens to the message.
- When you are finished addressing your message, click Send to send it.
Saved
This screen displays the messages that are currently saved. You can perform all the same functions on saved messages as you can on those that are in your Inbox. To save a message, highlight your message and click Save.
Deleting a Message
This screen displays the messages that are currently in your trash can. From this screen you can empty your trash can or recover deleted messages. To delete a message, highlight your message and click Delete. The message will now appear in the Message List of the Trash Tab.
Recovering a deleted message
To recover a deleted message, go the Trash tab of the Home menu. Select the message you want to recover and click Undelete.
Note: This only works on messages displayed in the Trash tab. If you have already emptied your trash can you cannot recover the message.
Personal Settings
The personal settings menu allows you to change your recorded name, as well as record and review standard greetings. You can set your Personal Operator (operator escape) and set personal numbers where the system will recognize that you are calling, all you have to do is enter your passcode. It also allows you to change your security code.
Recordings Tab
This tab allows you to record and review standard greetings. This table is used to select the greeting you want to record or review. The blue icon indicates which greeting is active.
Note: When you click Record or Play, the voice mail system will call the number you have listed under the Web PhoneManager Settings
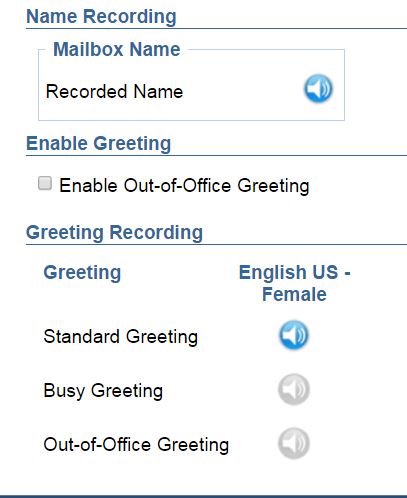
Note: If you select the "Enable Out-of-Office Greeting," this turn on the Out-of-Office Greeting and callers will not be allowed to leave a message.
Recording your Name
- In the Mailbox Name group, click Recorded Name. This will open the following window

- Click the Red Record Button.
- Record your message, and click Stop Button. Then, you can review the message and re-record it if you're not satisfied with it.
- To save your recording, click OK.
Greetings
You are allowed to record 3 different types of greetings. The Standard Greeting is what plays whenever a caller is transferred to your voicemail box because you could not answer the phone. A Busy Greeting can also be activated so that callers hear a different message when you are already on the line. Your Out-of-Office Greeting should be used whenever you will be out of the office for an extended period of time.
Note: When your out-of-office greeting is enabled callers cannot bypass it to leave a message. They must listen to the full greeting.
Recording your Standard and Busy Greetings
The following is an example of a standard greeting:
"Hello. You have reached first and last name at department for Virginia Commonwealth University (Health System). I am away from my desk at the moment; I will return it as soon as I can."
The following is an example of a busy greeting:
Hello. You have reached first and last name. I am on another call at the moment; I will return your call as soon as I can."
To record greeting:
- Click Personal Settings on the main menu, and then click the Recordings tab.
- Click the greeting type you want to record in the language group in which you want to record your greeting. This will bring up the following window.

- Click the Red Record Button.
- Record your message, and click Stop Button. Then, you can review the message and re-record it if you're not satisfied with it.
- To save your recording, click OK.
Recording and Setting your Out-of-Office Greeting
If you will be out of the office for an extended amount of time, record an out-of-office greeting. This is a temporary greeting that you can set to indicate that you are away from the office for an extended amount of time. Whenever you log on, the system asks whether the greeting should be removed or left in place to let your callers know that you are out. You might also let them know when you will return. While this greeting is active, it plays in place of your standard personal greeting. When you turn this type of greeting off, your callers will hear your standard personal greeting again.
A sample out-of-office greeting is shown below:
The following is an example of an Out-of-Office greeting:
"Hello. You have reached <enter name>. I am currently on <leave/vacation> and will return to the office on <date>. If you need assistance, please contact <contact information>"
To record and set an out-of-office greeting:
- Click Personal Settings on the main menu, and then click the Recordings tab.
- Click Out-of-Office Greeting in the language group in which you want to record your greeting. This will open the following window:

- Click the Red Record Button.
- Record your message, and click Stop Button. Then, you can review the message and re-record it if you're not satisfied with it.
- To save your recording, click OK.
Distribution Lists
To create or modify a distribution list you must first be a sponsor of one or more list(s). To request sponsorship you must submit a LANDESK ticket or contact our Client Support Group at 8-2227 (press option 2).
Once sponsorship has been granted it will display under the Personal Settings/ Distribution Lists tab.
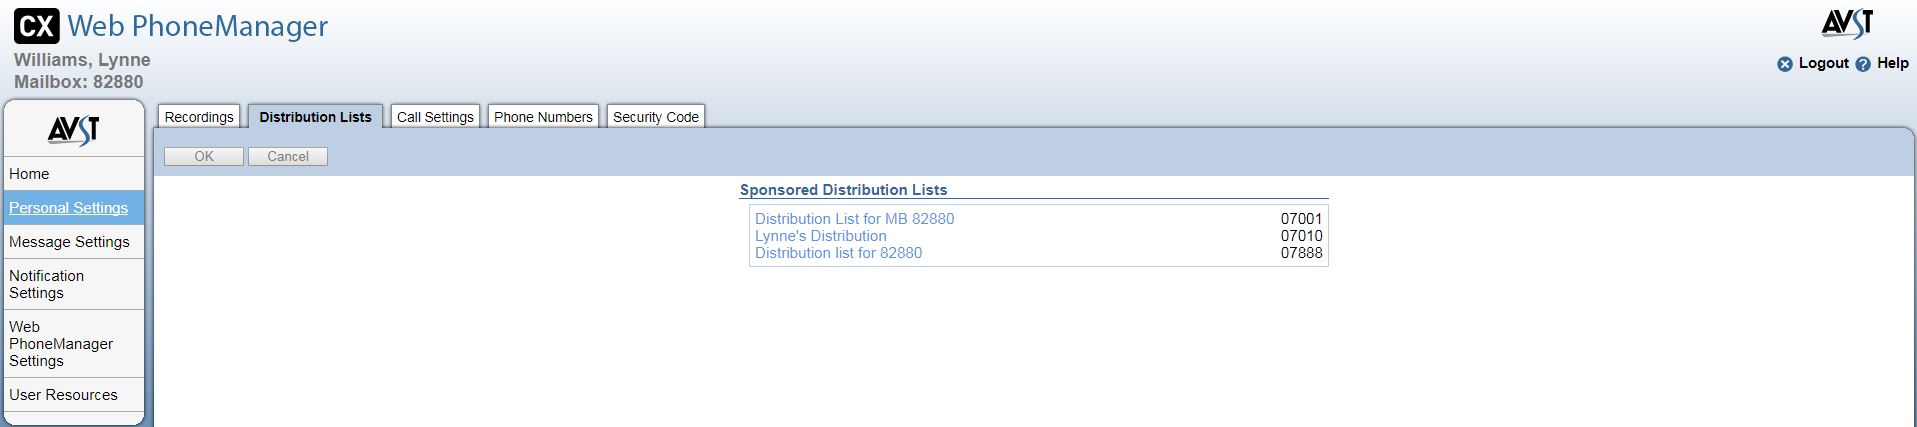
Click on the list to display the "Modify Distribution List" window.
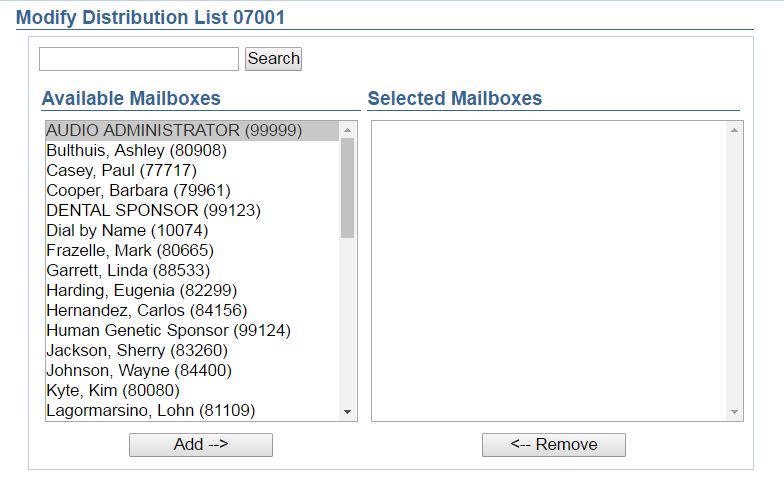
Modify Distribution List XXXXX - Add subscribers by typing a name or mailbox number in the Search box and clicking the adjacent Search button.
Available Mailboxes - In the Available Mailboxes column, select any new members you want to add to the list, and then click Add to move them to the Selected Mailboxes column.
Selected Mailboxes - In the Selected Mailboxes column, select any members you want to remove from the list, and then click Remove to move them to the Available Mailboxes column.
Click OK when you are done modifying your Distribution List.
Click Cancel to cancel the changes.
Phone Numbers Tab
This tab is used to enter your work, personal, home or other phone numbers that will be used for notification. The phone numbers on this screen can also be configured, through the Device Type/Capabilities field, to recognize the number when you call your extension and go directly to your mailbox login bypassing your personal greeting. You may want the auto logon ability for certain phone numbers in the list but not others. For example, if you have a company or personal mobile that you alone use, auto logon would be helpful. However, you may not want your home telephone to have auto logon configured since other people in your household may call you on your extension.
Device Type/Capabilities - Use to specify the current device behavior by selecting the desired type. To change the device type, select the type from the list.
Click the drop-down list to select the Device type you want to define.
- Phone: logon, can receive calls - Goes directly to the user's mailbox login bypassing the main CX greeting. Accepts outgoing calls from CX.
- Phone: logon, can't receive calls - Goes directly to the user's mailbox login bypassing the main CX greeting. Does not accept outgoing calls from CX.
- Phone: Receive calls only - Does not go directly to a user's mailbox. Accepts outgoing calls from CX.
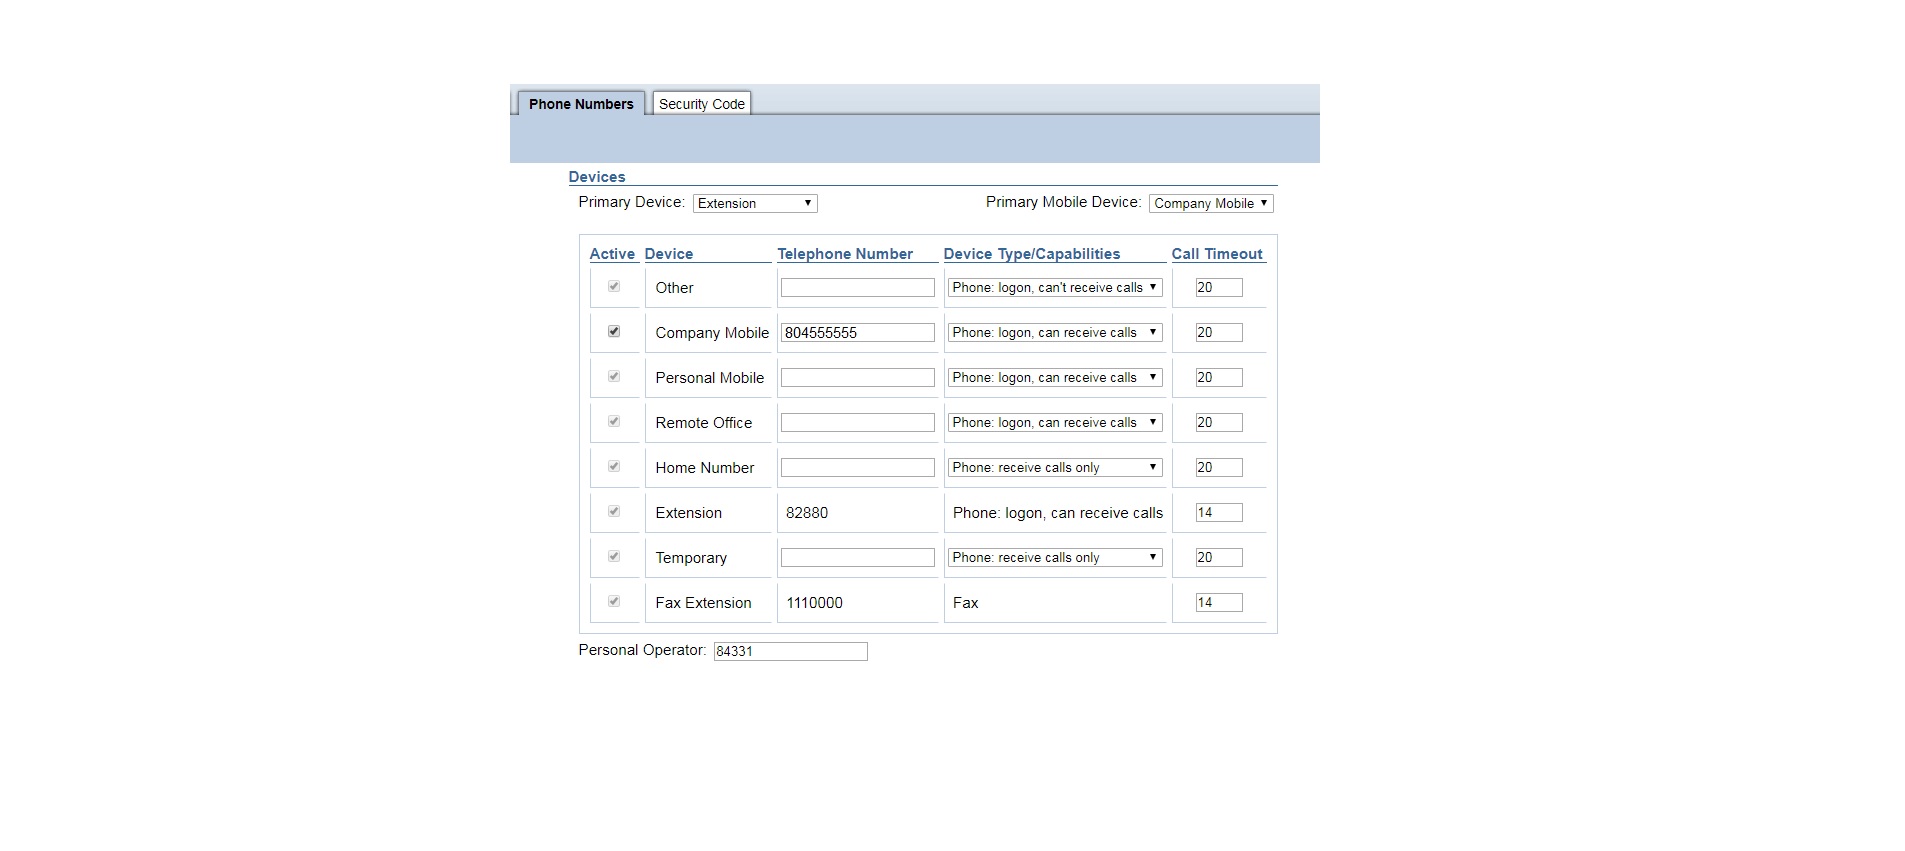
Personal Operator
Allows a caller to press 0 during the subscriber’s personal greeting and be transferred to the subscriber’s personal or departmental assistant. You can only enter a 5 digit on-campus number .

Security Code
Use this screen to change the security code you use to access your voice mail.
To change your security code: Enter your current code, then enter the new code and confirm it. Your security code must be 6 digits long.

Security Code
Presentation Tab
The presentation tab allows you to change how the voice mail system arranges messages and presents them to you.

Auto Play Envelope
Choose if you want the Voice mail system to play envelope information before or after voice, or not at all. Header information for voicemails tells you what time and the date the message was sent.
Envelope Content
You can choose if you want the Voice mail system to play the complete Envelope information or just the time and date.
Options
This section allows you to select your sorting options. You can sort the messages so that all messages marked urgent are displayed first. You can also sort the messages so that all messages of a different type are sorted together. You also have the option of sorting so that older messages appear at the top or bottom of your inbox.
Language
This allows you to change what language the Text-to-Speech function is in. It also changes what language different elements of the unified messaging forms are generated in.
This article was updated: 10/15/2024