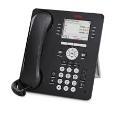
Move/Reboot/Reset an Avaya 9600 Set

PLEASE NOTE:
IN ORDER TO ENSURE ANY FUTURE SERVICE CALLS ARE DISPATCHED TO YOUR NEW LOCATION YOU MUST CONTACT VCU TELECOM AT (82)8-2227(press option 2) AFTER YOU HAVE MOVED YOUR TELEPHONE.
The instructions listed below can be used to move your 9600 series set. However, if we need to dispatch a technician to correct any errors, you will be charged $150.00. You can submit a request for VCU Telecommunications to move your set for $25.00/telephone.

1. Log Out if moving the set to a new location that is equipped with a computer jack.
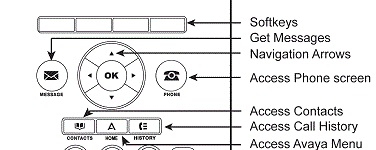
- Press the “HOME” button (Avaya Menu).
- Press the "Log Out" button (bottom button on left column)
- Press the "Log Out" button (first grey button below the display)
2. Unplug the phone from the computer jack.
3. Plug the phone into the computer jack at its new location. (computer plugs into the back of the phone)
4. As the telephone begins to reboot
- Watch the display for the prompt “press * to program”.
- Press *
- When prompted to “Enter Code” enter “27238” and press the # button
- Press the “Address” button (second button on left column)
- Press the down arrow 13 times to highlight the “VLAN ID” feature.
- Press the “Change” button to change the VLAN.
- Enter the new VLAN number into the “New settings” field and press the “Save” button.
- If you do not know your VLAN ID, go to https://www.pubapps.vcu.edu/ePhones/viewVLAN.asp
- Log in using your eid and password
- Select your building and floor.
- Click submit.
- Press the “Back” button
- Press the “Exit” button to restart the phone.
The display will read restarting…
5. When the reboot is complete, the display will read “Avaya one-X.
6. Enter extension and password.
- Enter your 5-digit extension and press “Enter”
- Enter Password and press “Enter” (password is your 5 digit extension)
- The phone will register and be in service in the new location.
This article was updated: 04/16/2020