X-Win32 Installation & Configuration
Overview
X-Win32 is software which VCU Technology Services has obtained under a site license agreement with StarNet Communications. The X-Win32 software allows you to connect a Windows PC to a remote Unix or Linux server and run windowing applications on the server.
The license permits current VCU faculty, staff, and students to install X-Win32 for University teaching, research, or administrative use. The license agreement prohibits the distribution of copies to anyone else and for any other purpose.
The default license key that is distributed for X-Win32 only allows you to use X-Win32 from a PC on the VCU network (128.172.x.x). To use off-campus, first, start a VCU VPN session -- for more information, please see RamsVPN:
The instructions below are for X-Win32 version 21.0 (the installer file is named x-win210-11sf.exe). Instructions for X-Win32 version 14 and previous versions are somewhat different.
Topics covered below:
Install X-Win32
Note: You need not un-install an older version of X-Win32 before installing this new version.
To install X-Win32, double click the file that you downloaded (x-win210-11sf.exe). This will launch the installation wizard. Follow the on-screen instructions to install X-Win32 version 21.0.
After installation, this new version will appear in your Windows Start menu as X-Win32 21.
Licensing may be required after installation (see next section).
License X-Win32
Please note:
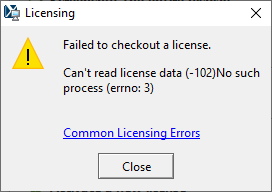
- You can probably skip licensing if you have or had an older licensed version of X-Win32 installed on your computer (even if you had uninstalled it). The newer version should have obtained the license stored in the system by the older version. To test, launch X-Win32 21, then click the Launch button. If it complains "Failed to check out a license," then you must perform these licensing steps.
- You MUST have an Internet connection to license X-Win32.
- These instructions are for X-Win32 version 21.0 (the installer file is named x-win210-11sf.exe). Instructions for older versions of X-Win32 may be somewhat different.
To begin licensing, launch X-Win32 21 from your Windows Start menu.
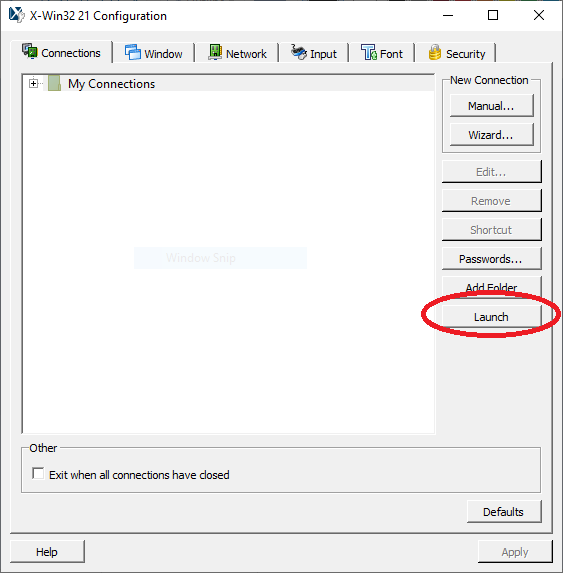
The following X-Config window will be displayed. Click the Launch button circled in red below.
If you are prompted by one or more Windows Security alert screens, click the Allow Access button in each.
The following two windows will be displayed:

CLOSE BOTH of those windows
Now once again, click the Launch button in the X-Config window:
The following License Wizard Introduction window will display. In this window, select "License your copy using an activation key," as circled in red below, then click Next.

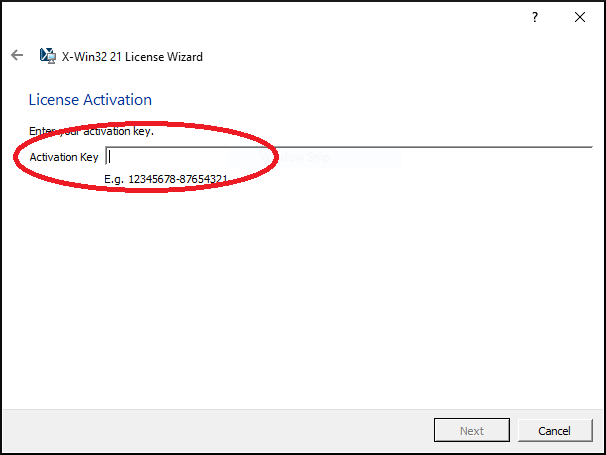
The following License Activation screen will be displayed. In the textbox of this screen, copy/paste (or carefully type) the license activation key that was emailed to your VCU email address when you registered and downloaded the X-Win32 software.
Then click Next.
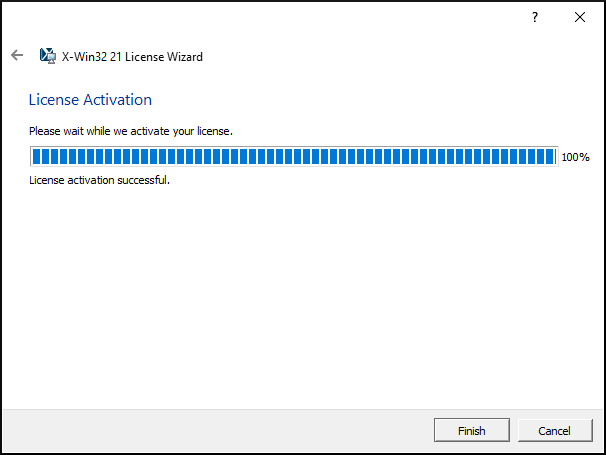
The final screen, shown below, should display "activation successful". Click Finish to complete the licensing procedure:
Configure X-Win32
Before you can use X-Win32 to connect to a remote server, you must configure an "SSH connection" for that server. This process is done once for each server and is described below.
Note: If you had an older version of X-Win32 installed, the newer version should have automatically inherited any remote connections that were established for the older version (even if you had uninstalled the older version).
In the example screens shown below, we will be configuring a connection for an old Unix server (koti.vcu.edu).
To begin configuration, launch X-Win32 21 from your Windows Start menu.
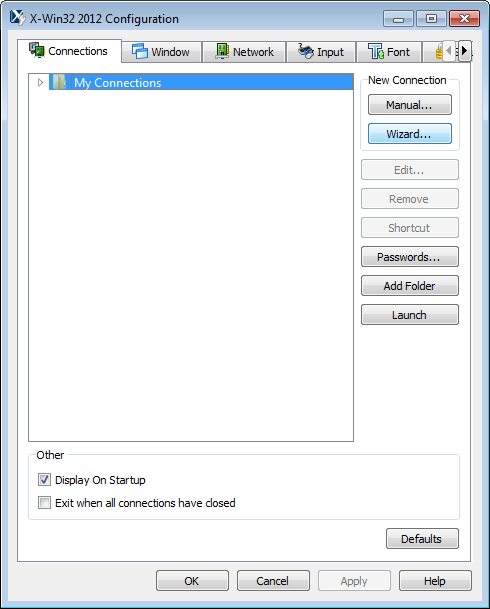
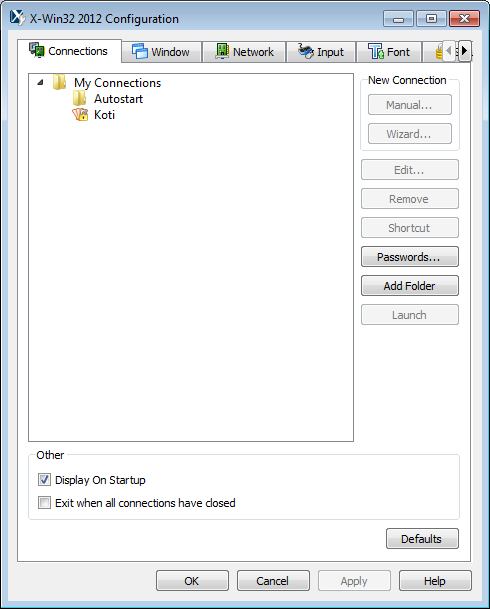
In the Configuration screen that appears, as seen below:
- Select the Connections tab.
- Then select My Connections.
- Then click the Wizard button.
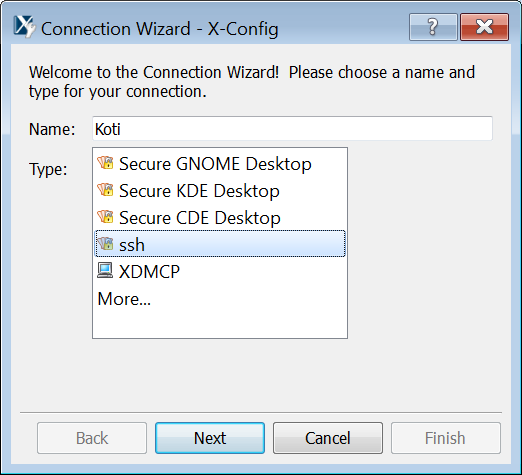
In the subsequent screen shown below, type a name for the new connection (we have typed "Koti") and select ssh for connection type, then click Next:
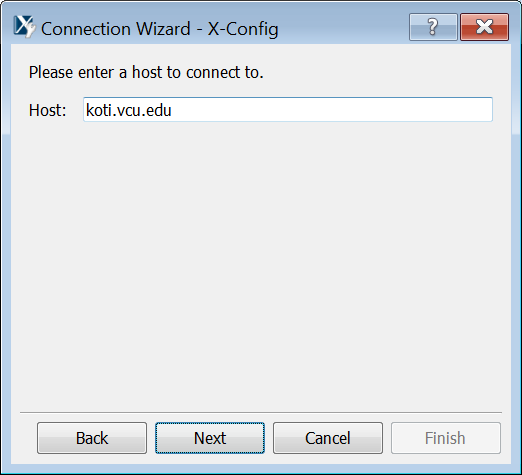
In the subsequent screen, enter the server's address (e.g., koti.vcu.edu), then click Next:
In the following screen shown below, type the login name (i.e., the user or account name) with which you wish to login on the server (we have typed "jdoe"), then click Next. For security purposes, leave the Password box empty, so that you will be prompted for your password each time you log in:

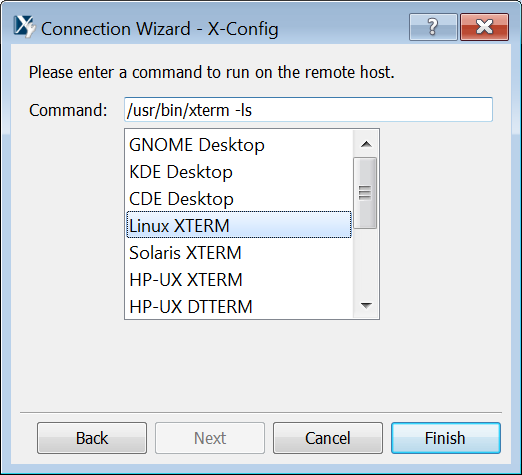
In the subsequent screen shown below, select the operating system used on the server (for Koti, we have chosen "Linux XTERM"). When you do so, the Command box will be automatically filled in. Now click Finish:
After creating the connection for the Koti server, the X-Config window will look as seen below (you may have to expand the My Connections item by clicking the small arrow just to the left of My Connections):
Using X-Win32
Launch X-Win32 21 from your Windows Start menu.
The X-Config window will be displayed (as shown immediately above).
To connect to a server so you can log in, in the above X-Config window:
- Select the server you wish to use (for example, Koti).
- Click the Launch button.
The following Utility window will display.

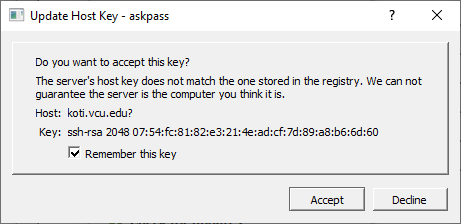
The first time you connect you connect to a particular server, you may also see the screen shown below (it might be hidden behind another window). If so, click Accept.
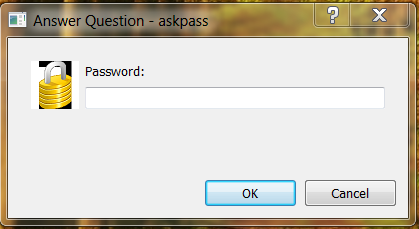
When prompted, type your password, then click OK.
A session window for the server will appear, as shown immediately below. It will present you with your server's command prompt (shown simply as ">" in the example screen below — your prompt may differ), at which you may type commands to be performed on the server.
If desired, you may close the X-Config window during your Server session. However, you must leave the Utility window open during your session. Closing it will immediately end your session. and it will also immediately close any windowing applications that are still running (see Windowing Applications just below).
When finished with your remote session, issue the appropriate logout command (if unsure, try typing exit). If desired, you may then also exit or close the Utility window.
Windowing Applications
You can issue commands that run "windowing" applications on the server (applications that will open a window on your PC screen).
For example, if you are logged in to a Linux or Unix server, you can type the command:
xclock &
as shown in the window below, and press the Enter key.
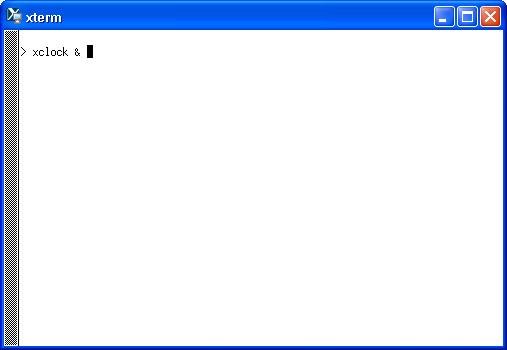
A window for the xclock application will be displayed on your PC's screen:

When finished, you may close the application window.
Background Commands: As with the xclock command shown above, an ampersand "&" may be optionally typed at the end of most commands on the Unix server. The ampersand will cause that command to run "in the background" on the server. You will immediately receive another command prompt so that you can issue further commands on the server, or even logout if desired. That command will continue to run in the background until finished. This feature is useful, for example, for launching programs or applications that you expect will require a long time to finish execution. However, as noted above, beware that if you run any windowing applications in the background, although logging out of your session will not end such applications, closing the Utility window WILL immediately end them.
This article was updated: 01/31/2023