How to Create a Project Plan
The video and following instructions will show you how to create a project plan within Data Management System.
1. From the DMS home page, click 'Projects' and then 'Create New Project'.

2. You will now enter the research information:
- Create as:
- Owner: This individual is fully accountable for all Data Security Requirements agreed upon. Only a project owner can acknowledge agreement with these requirements and submit the project for approval.
- Editor: This individual can select which data elements and services the project will use, and can view the requirements.
- This is a Template Project: This box can be selected if you want make this project plan a template. This will allow you to copy the data type(s) and the specified services to any new plans. This will NOT copy the project details into a new plan. This is useful if you plan to have multiple projects that will contain the same types of data (e.g., PHI) and use the same services (e.g., Koti).
- Title: This is the tile of the research project/study
- Purpose: This is the purpose of the research project/study.
- Contact Phone: The primary individual’s phone number for the project
- Contact Email: The primary individual’s email address for the project
- MBU: Major Business Unit (NOTE: This may already be populated, but can be changed).
- Product Category: You can select one or many types of product categories.
- If you are unsure of the category, place your mouse cursor over the text to make a help box appear.

- Protocol/Proposal Number (e.g. HM/FP number): This is the associated protocol/proposal number for the project. (NOTE: This field will only appear if you select a Product Category that needs a Protocol/Proposal Number. Otherwise this field will be hidden)
- Start Date: Start date of the project
- End Date: End date of the project. If your project does not have a specified end date see 'Indefinite End Date'.
- Indefinite End Date: If your project does not have an end date, check this box.
- Detailed Description: You can provide a more detailed description of the research project.
3. If you need to add additional project members to the plan, you can use the Project Members menu on the right-hand side of the screen:
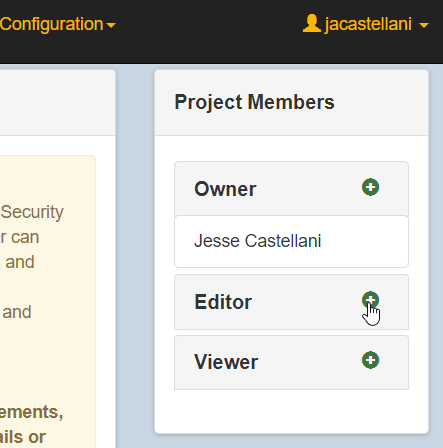
- Click the ‘+’ (Plus-sign) next to role you want to add. This will bring up a new menu. A description of the various roles are below:
- Owner: This individual can edit and view the plan, and is accountable and responsible for all the Data Security Requirements for the plan.
- Editor: These individuals can edit the plan, but cannot approve the plan.
- Viewer: These individuals can view the plan, but cannot alter the plan.
- To search for a user, type either their EiD, first name or last name in the ‘Select User’ field.
- If you’d like to notify the user via email, check the ‘Notify with email’ check box.

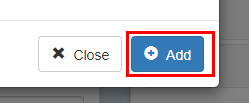
- After selecting a member, click the ‘Add’ button to add this individual to the plan.
4. After you enter in the project plan information and have added all additional project members, click Create Project:

5. A new screen will appear confirming the project was created. You will be presented the following options:
- Project Listing: If you are not ready to choose the data types associated with the project, then choose this selection. It will bring you to the project listings.
- Data Type Select: If you are ready for input the data types associated with the project, choose this selection. (NOTE: For the demonstrations of this HOW-TO, we’ve chosen the ‘Data Type Select’ button.)

6. On the Data Type Selection window, you can select one or many types of data that are applicable to your project.
- As you select data types, a window on the right-hand side of the screen will appear providing information such as the data steward, the description of the data type, as well as applicable policies.

- You can use the search bar to search for a specific data type. The screenshot below shows using the search bar to search for ‘student’. This results in two data types being show: ‘General Student Education Records’ and ‘Protected Student Educational Records’. You can select each data type to learn more using the pane on the right (see picture above).

- After you have chosen the applicable data types, click Submit.
7. On the Service List selection window, you will select the services that you plan to use in each service category. A description of each service category is listed below:
- Service Category Type - This drop-down window allows you to switch between the types of tools and services; such as those used for data storage, data transmission, and data collection, among others.
- Storage - Storage Services are services that are used for permanent/temporary storage of data.
- Network - Network Services provided by VCU describe the many networks available for use here on the VCU campus. Each network has different rules and restrictions on what can come in, what services/ports are open, etc. (e.g. Service HTTPS/ Port 443 on VCU Faculty and Staff Network).
- Transmission - Transmission Services transfer data between devices and endpoints. (e.g. Filelocker)
- Processing - IT Services responsible for data processing are listed here.
- Other - These are other services that do not fall under this category (e.g. Printing)
- Collection - There are collection services that are used to collect data and information (e.g. Redcap).
- To learn about a specific service, click on the service and more information will be available in a right-pane.
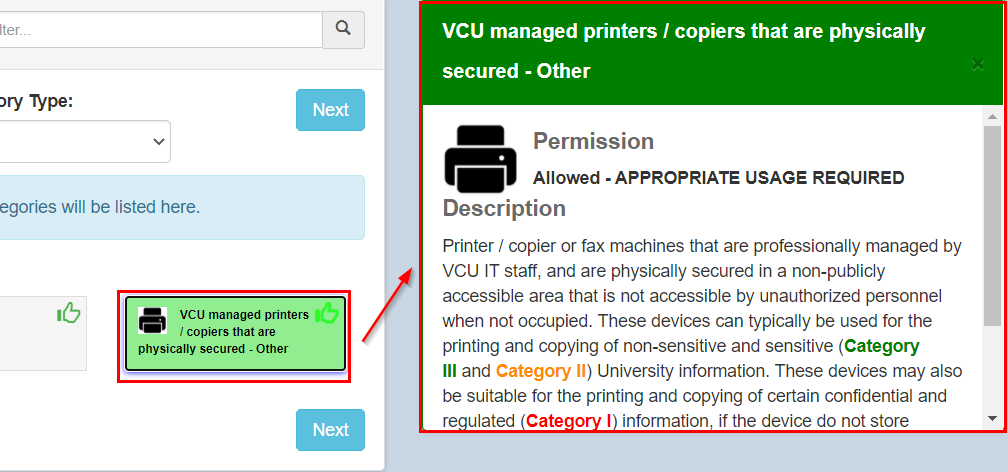
- Select the services that you are using for each of the service categories. After you select the service(s), click the 'Next' button, to advance to the next service category. If the project does not utilize a specific service category (e.g. Other), chose the 'None' selection.
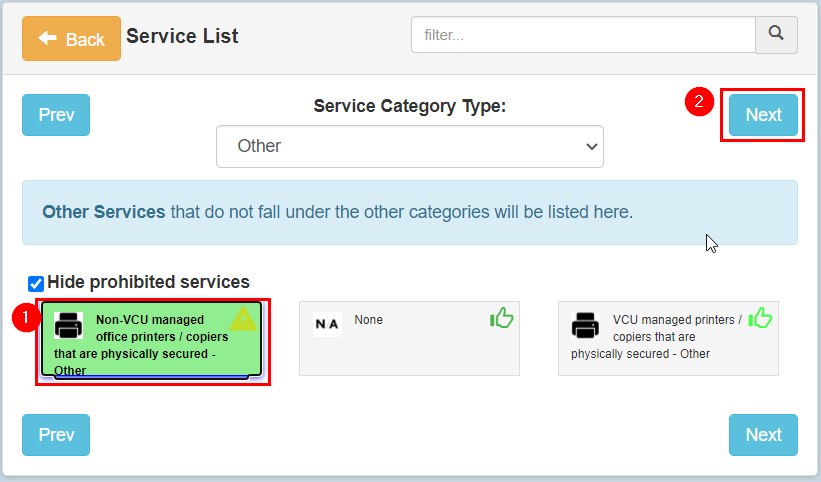
- Other:
-
Hide prohibited services - This checkbox allows you to hide or unhide any services and tools that are unsuitable for the information you work with. By default, this checkbox is checked.
-
The Service selection button - The tool/service selection button allows you to check the details of specific tools and services, understand what they do, as well as contact and enrollment information for the tool/service. Further, there are icons next to each of the tools/services and generally, these icons show the permissibility of the use of these tools/services in relation to the information types you have selected. There are generally three icons.
- A green thumbs up icon next to the tool/service typically means it is OK to use the tool/service to handle the information you work with. (Please note that while a tool/service may have the necessary controls to handle certain sensitive data, many times these tools/services must also be used properly in order to satisfy security and compliance requirements).
- A yellow caution sign typically means that the use of the selected tool/service will require some additional review and approval.
- A red circle with a line drawn through it means the tool/service cannot be used with the combination of information types you have selected.
- A green thumbs up icon next to the tool/service typically means it is OK to use the tool/service to handle the information you work with. (Please note that while a tool/service may have the necessary controls to handle certain sensitive data, many times these tools/services must also be used properly in order to satisfy security and compliance requirements).
-
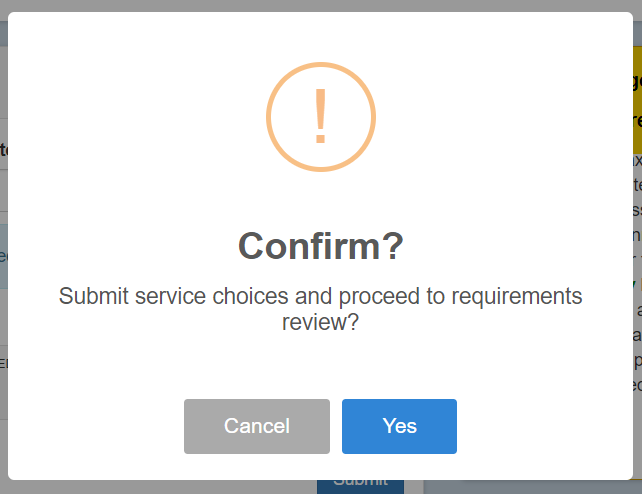
- After you select all the services in each of the Service Categories, you can submit the plan by clicking 'Submit', on the Collection Service Catalogue tab. Before you submit your plan, you will have one final confirmation screen (see below).
- Click “Yes” to finalize your services and move to the requirements review.
- If you selected all services with a green thumbs up icon, your project will be auto-approved.
- If you selected any service with a yellow caution sign, your project will need to be reviewed by the Information Security Office (ISO) or other data stewards. A member of the ISO will reach out to you shortly.
- Click “Yes” to finalize your services and move to the requirements review.
8. A pop-up will appear. Click ‘Ok’ to review the plan’s requirements.

9. You will now review your plan’s technical, administrative, physical requirements, applicable VCU policies, applicable laws and regulations, and special instructions These requirements are populated from the data types you selected. We recommend meeting with your departmental IT to help review the technical requirements.
- Review each section (e.g. Administrative Requirements, Data Security Requirements, etc).
- Required controls are denoted by a solid blue check mark.
- Recommended controls are denoted by a light-blue check mark.
- Non-Required controls are denoted by dark circle with a strike through the center.
- Approval Needed controls will be denoted with a yellow circle with a question mark imprinted in the middle.
- Required controls are denoted by a solid blue check mark.
- There are additional filtering/functionality options available in a window in the lower-right hand corner of the screen:
- Hide Not Applicable Requirements - This is will remove any controls that are not applicable to your plan.
- Hide Recommended Requirements - This will hide any recommended requirements.
- Print - This will print the requirements page. This is useful if you want to a PDF copy of your plan or if you want to print a physical copy.

10. At the bottom of the Requirement Approval screen, you have the option to approve the plan or reselect the services.
- To approve the plan - click the checkbox “(I agree to all the requirements listed above and assume full responsibility and ownership of the data elements of my project.”) and click ‘Confirm and Proceed’.
- To reselect the services - click Back to Selection.

11. You will be presented with one last confirmation screen. Click ‘Yes’ to proceed. Otherwise click ‘Cancel’.

12. You will be presented with a instruction screen on how to add comments to the data types that will be sent to the University’s Data Stewards. Click ‘OK’ to proceed.

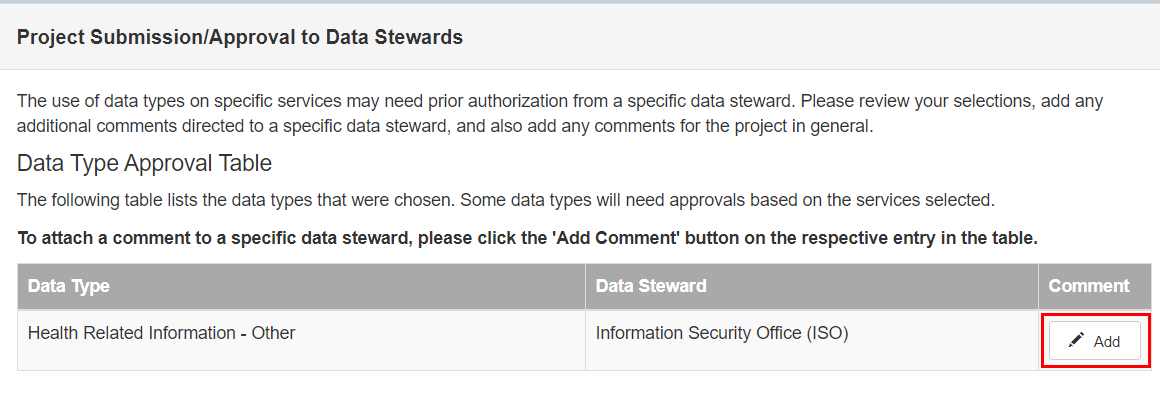
13. You can now add comments related to the different data types that were selected.
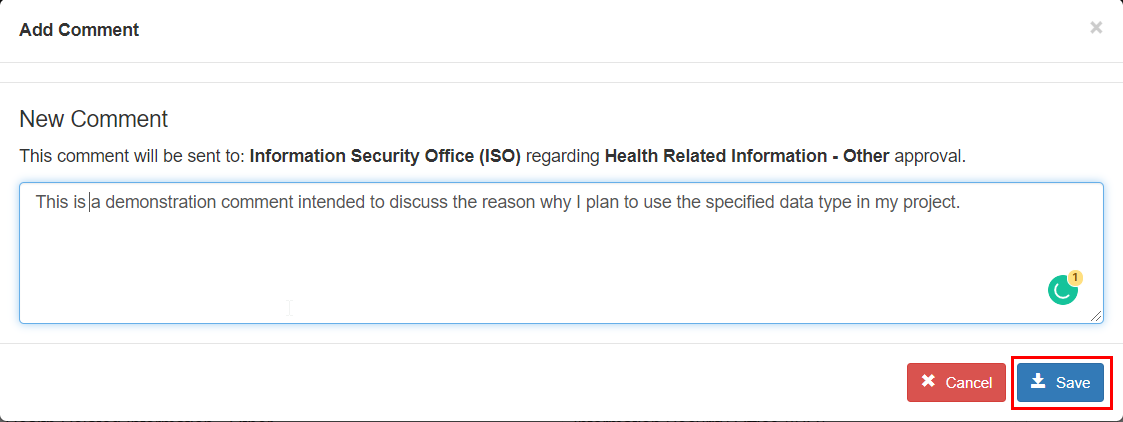
- To add a comment, click the Add button. A window will appear where you can add a comment. Click Save to save comment. This comment will be sent to the data steward.
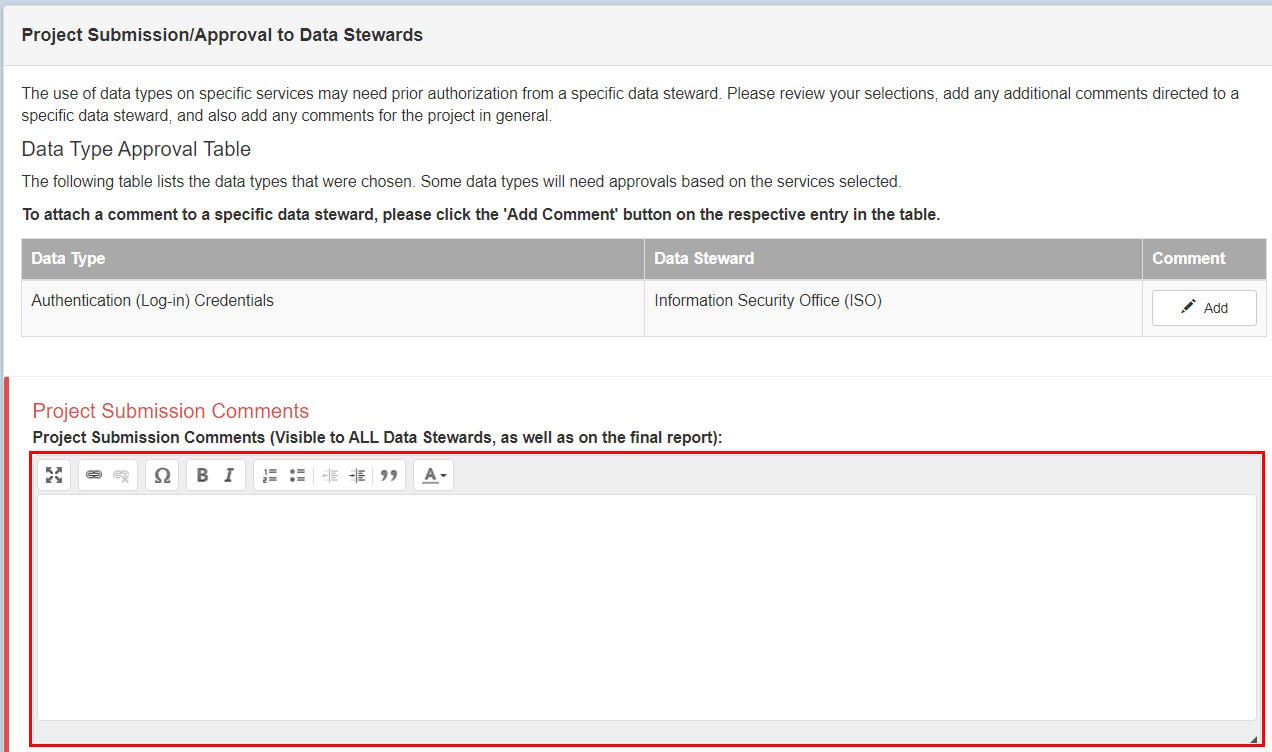
- In the Project Submissions Comments, you can add any additional comments that will be visible all Data Stewards.
14. After you add your comments, click the Submit button. A final confirmation screen will appear. Click ‘Yes’ to finalize the project. (NOTE: Once you click Yes, you CANNOT revise or edit your plan).

15. After you submit your plan, you will land on the status page for your project. If your project needs to be reviewed, you will see a “Awaiting Approval” status in your project description. Relevant data stewards will need to review your request before it is approved. Additionally you can review the details of your project. For more information regarding this page, please visit the How to View Project Plans documentation.


